Last week, when I posted about how to make your own homemade fabric softener, there were quite a few comments and concerns about fabric softeners in general leaving residue on lint screens, etc.
The concerns ranged from the dryer being less effective to actually catching fire!
Luckily one of the comments left was from a Mom and firefighter who had some GREAT SAFETY TIPS and dryer maintenance rules to follow.
So I decided to be a good little soldier and follow the rules the nice firefighter lady gave us! (Her comments are in red.)
Anonymous said...I am a mom and a fire fighter as well. This comment is for the questions concerning your dryer lint screen and softeners. Many dryer fires are started by lint screens and clogged dryer vents. Quite common. BUT here is a simple rule of thumb to prevent a dryer fire due to build up. About once a month, depending on the amount of laundry you do, take out your dryer lint screen. Rinse it with warm water and use a soft tooth brush to scrub it clean. It is simple maintenance we should all do regardless of whether we use softener or not. The tell tale sign it is time to soak and scrub, put your screen under running water. If it holds water, it needs cleaning. There is more than one reason for this "clogging" effect: fabric softener, type of fabrics, laundry soap not rinsing completely out, lint build up not releasing when you swipe.

So, here is the lint screen from my dryer. I decided to put it to the test...and sure enough...look at the water beading up on it! Time to give it a bath!

I soaked it for a little while in warm, soapy water and scrubbed it with a kitchen sponge.
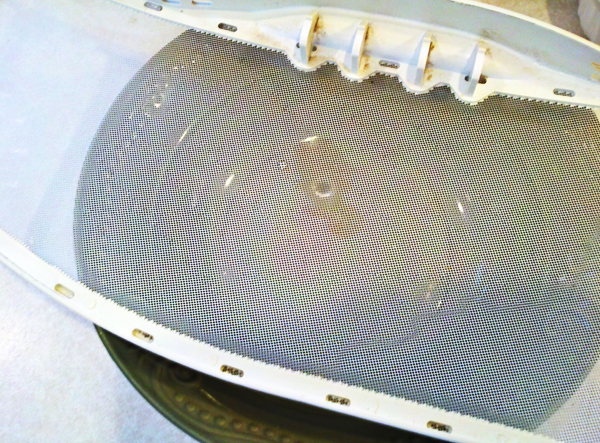
And here it is after. I did the same thing....poured some water on it....went straight through!Success!
General rules to always follow and you will have an efficient long life and fire hazard free dryer.
1. clean lint trap after each dryer cycle. (Already doing this, so I'm feeling pretty good about myself.)
2. wash lint trap after about 20-30 loads or once a month (let it air dry on counter before putting back in dryer). (NOT doing this nearly often enough!)
3. follow manufacturer instructions on clothing and heat settings. (I do OK with this.)
4. get dear hubby or assistance for this one, open the top of your dryer (if front loading) get the old shop vac or vac cleaner and use the hose to suck out the excess lint inside of your dryer, staying clear of wires and belts, Oh and unplug your dryer from outlet first!

As usual, I was too impatient to wait for the hubster to come home and help with this....so I just found a REALLY BIG SCREWDRIVER out in the garage and gently pried the top off the dryer. It popped off quite easily!
 |
| Under the hood. I took a LOT more pictures...but somehow they got deleted. :-/ |

There was a LOT of lint down inside where the lint screen goes in that I vacuumed out!
On the above mentioned you can also call an appliance repair service and get general maintenance cleaning for a fairly reasonable price. This should be done once a year.You will be amazed at what lies inside your dryer that you don't actually see.
5. while doing number 4, clean and clear out the hose to the dryer for discharging vent, this is a commonly forgotten area and causes alot of fires itself.


Awkward angle to try to snap a picture...but the long, black thing is my vacuum attachment. I gave the length of the hose and the opening where it connects to the dryer a thorough vacuuming. After I was done vacuuming I checked the debris cup in the vacuum and even though I couldn't see much dust and lint while I was vacuuming...there was probably about 2 cups of dirt in it!
No comments:
Post a Comment